Tips of Photoshop
Wonder how an image was made? Ask it here! Or If you know how it was done guide others too…. Here is a discussion area for beginners to experienced users of Photoshop & Photoshop-related topics.

Saturday, March 01, 2008
Saturday, March 31, 2007
Did you try to adjust the Angle and Distance of a Drop Shadow Manually ?
well friends, when you’re trying to adjust the distance and angle of the drop shadow layer style, and got tired of experimenting, say enough to guessing, grap your cursor out of the dialog area: it will become a move tool allowing you to position the shadow where you want it. This will affect the distance and the angle attributes.
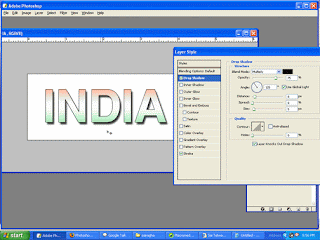
This also works for Gradient Adjustment, Satin, Pattern Overlay & Inner Shadow.
Thursday, March 29, 2007
Targeted Drag and Drop
Drag and Drop is one of those key functions in PS that is a power tool for almost every image build.
It has an number of advantages over copy and paste. Probably the most important is that when you copy and paste the copy stays in the clipboard until you purge it or replace it with another copy. So while you are working your machine is hampered by holding onto that 20meg duck you copied and forgot about a few hours back.
Drag and Drop doesn't leave anything in the clipboard so not only is it easier to use but it also keeps your system running faster.
Here are a few Drag and Drop (DD) tips;
Targeting: If you want to DD an element and have it land in a very specific location, set the zoom magnification on both document to the same percentage. Then click with the Move tool on an alingment point in the source document. When you drag over to the target document, position the cursor over the alignment point in your target document and release. This will drop the source alignment point exactly over the target release point.
Centered: If the target and source document are different sizes/different pixel dimensions then when you hold down the Shift key while you do the DD the element will drop centered in the target doc.
Pin Registered: If the target and source document are the same size/pixel dimensions then when you hold down the Shift key the drop will land in the target in exactly the same location it was in the source. This is really great when you have been working on a file and have saved versions of it along the way. As long as you haven't Cropped, Image Sized, Canvas Sized it since the older version you can use this to take selected pieces from the old document and have them land in perfect position in the current document.
Center on Selection: If the target document has a selection active then Shift-DD will drop centered within the selected area.
Adobe Photoshop CS3 New Features
Adobe Photoshop CS3
Photoshop is the industry-leading digital imaging tool for designers, photographers, and artists. It includes Adobe Bridge for image browsing and management.Cost: $649 New / $199 Upgrade
Runs on: Windows XP, Windows Vista, and Mac OS X.
Universal binary for Power PC and Intel-based Macs.
Ships: April 2007
Included in these Adobe Creative Suite 3 Bundles:
* Design Standard
Key New Features:
* Nondestructive Smart Filters
* Quick Selection Tool
* Refine Selection Edge
* Auto-align and auto-blend layers
* Black and White Adjustment
* Streamlined interface
* Enhanced Camera Raw support
* Export to Zoomify format for viewing full resolution images on the Web
* Adobe Device Central for mobile product design
Enhanced tools:
* Vanishing Point now allows you to create multiple, adjustable angle perspective planes.
* Automatic alignments in Merge to 32-bit HDR.
* Chanel Mixer allows custom presets.
* Curves adjustment allows custom presets and offers a larger display with integrated histogram showing multiple color channels.
* Photomerge now offers automatic layer alignment and blending.
* Clone source palette offers a preview overlay and enhanced precision for working with the clone and healing tools.
* Simplified Printing interface.
New in Bridge CS3:
* 3-column layout and saved workspaces
* Filters panel
* Image stacking function
* Loupe tool for zooming in on details
* Flat view
Note: With the release of CS3, Adobe ImageReady has been discontinued--it is no longer included with Photoshop.
Adobe Creative Suite 3 Products Overview
Adobe Creative Suite 3 Products Overview
CS3 Master Collection
Master Collection
Today, Adobe announced details and pricing for the new versions of all its Creative Suite products, which will be offered in various combinations in six different Creative Suite 3 bundles including CS3 Master Collection combining all of Adobe's design and development applications in a single box.
You can learn more about all the Creative Suite 3 standalone applications and bundles in my Adobe Creative Suite 3 Products Overview.
Creative Suite 3 is the largest release in Adobe's 25-year history, and represents what the company calls "the best of Adobe plus Macromedia." The public is invited to attend a live Webcast of the Creative Suite 3 lunch event taking place today in New York City. To attend, visit http://www.adobe.com/go/cs3launch at 3:30 p.m. Eastern time.
One big change in the release of Creative Suite 3, is that Adobe is no longer allowing users to upgrade from any older version to the current version. To qualify for upgrade pricing, you must currently own a product that is not more than three versions old. The only exception to this is for users of Premiere or Premiere Pro, who can upgrade to Premiere Pro CS3 or CS3 Production Premium from any older version.
Historically, Adobe has allowed free upgrades to to the current version to users who purchased the previous version after the official announcement date of a new version. That means if you are currently a user of a Creative Suite application that is more than three versions old, it would be a good idea to purchase a CS2 upgrade right now, so you will get a free upgrade to CS3 when it begins shipping in April.
Adobe did not answer my questions regarding cross platform licensing, so at this stage it appears as though the licensing policy has not changed--Macintosh and Windows products will be packaged separately.
I'll post more news as it comes up... meanwhile, check out the products, and feel free to post your comments and questions.
Tuesday, March 27, 2007
Monday, March 26, 2007
Tricky Selections
Here I have an apple that is plunged into some water, while it’s a nice photograph but I want it to pop more and want to colorize the water maybe towards dark blue or purple color.
So the problem is how can we select the water in this image or deselecting the apple as well.
 Photoshop provides a wide range of methods and tools to make selections and sometimes it becomes hard which one to use.
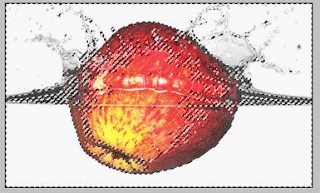
So the method I came up with to do this is hitting ALT+CTRL+` Keys to select the highlights of the image.
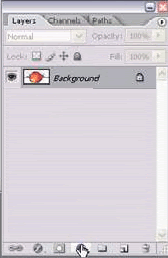 Click on New Adjustment Layer.
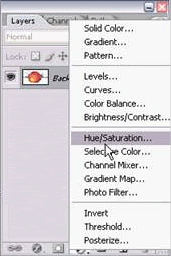 And select Hue/Saturation in New Adjustment layer.
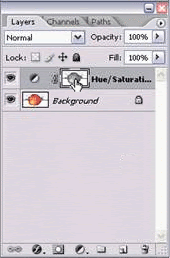 Double Click the Hue/Saturation Layer.
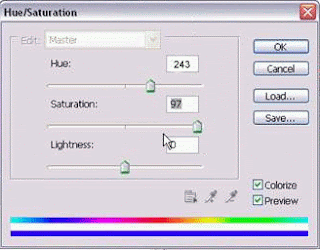 Check the Colorize option and set the ranges above.
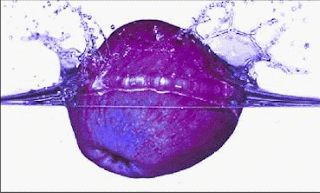 Total image changes into one color.
 Now take the Brush
 Be sure to set the foreground color Black.
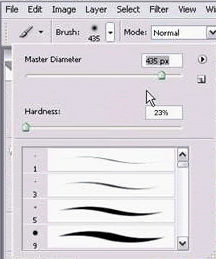 Set the Brush options to above ranges
 Make the Brush Opacity 100% and Flow 100%.
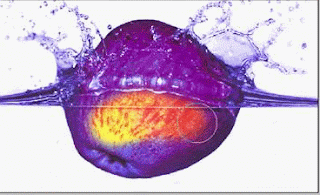 Now Rub the apple areas as shown above.
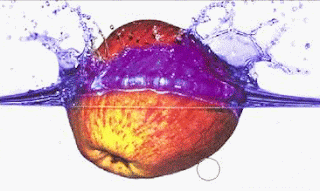 The complete Erased area.
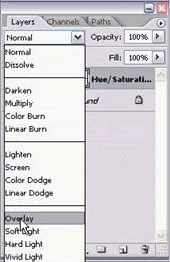
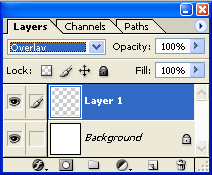
To give the image a more natural look change the mode of the adjustment layer to Overlay.
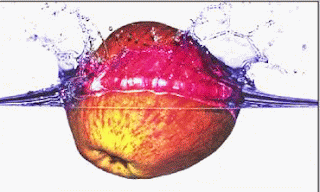 Here is the Final look of the trick. You can make it more effective by creating a duplicate layer of the adjustment layer as a final step.
Tuesday, March 20, 2007
Auto Straightening
Here is hidden little tip that allows you to let Photoshop straighten an image that is off by a few degrees.
Activate the Measure tool, I or Shift-I.
Click-drag from the bottom of the rotated object edge and drag up along that line, then let go at the top. Make sure this line represents the current angle of the object you want to straighten.
Now hold down the Option (Mac) or Alt (PC) key and position the cursor over the top endpoint of your measure line. You should see the cursor change into a protractor. With the Shift key held down drag a perfectly vertical line down and let go. You can think of this last line as your target "angle".
Finally go Edit, Transform, Rotate and... voila' the object is automatically rotated to your target angle.
Saturday, March 10, 2007
Painting with Filters
Here's a sweet technique that allows you to paint with filters or for that matter any other effect you can apply to an image in Photoshop.
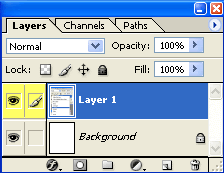
First, duplicate the layer by dragging it down to the Make Layer icon at the bottom of the Layers palette or Command-J for the Mac, Control-J for the PC.
Then run the filter, color adjust, whatever... on the duplicate layer.
Add a Layer Mask to the duplicate layer by clicking on the Make Layer Mask icon at the bottom of the Layers palette.
Fill the Layer Mask with black from the Edit, Fill dialog or hit the D key for default colors and then press Command-Delete for the Mac, or Control-Backspace for the PC. The effect on the duplicate layer will disappear because black the Layer Mask hides imagery on the associated layer.
Finally, activate the Paintbrush and paint with white on the Layer Mask. White reveals imagery on the "effect" layer. So now you are "painting" in the effect from the duplicate layer.
For more subtle effects lower the opacity on your paint brush. To remove the effect, paint with black.
(edit)
I wanted to point this one out because I have been asked how to control the effects of sharpening.
Use the technique above to duplicate the image to be sharpened and the run a Filter, Unsharp Mask on it.
Follow the steps to create a Layer Mask, fill with black. The sharpen layer will disappear. Paint white on the Layer Mask for the areas you want sharpened.
Also keep in mind that because the sharpen is on its own layer you can use the Layer Style, Blending Options, Blend if: sliders to hide or show areas based on density and color.

